When I started this blog 4+ years ago, never did I ever think I would be sharing the inside of my pantry, yet here we are! If you follow along with my monthly goals, you probably noticed I’ve been working on this pantry project for quite some time. I am overjoyed to say the makeover is finally done and that the content of my pantry are no longer spread out all over my house! 🙂
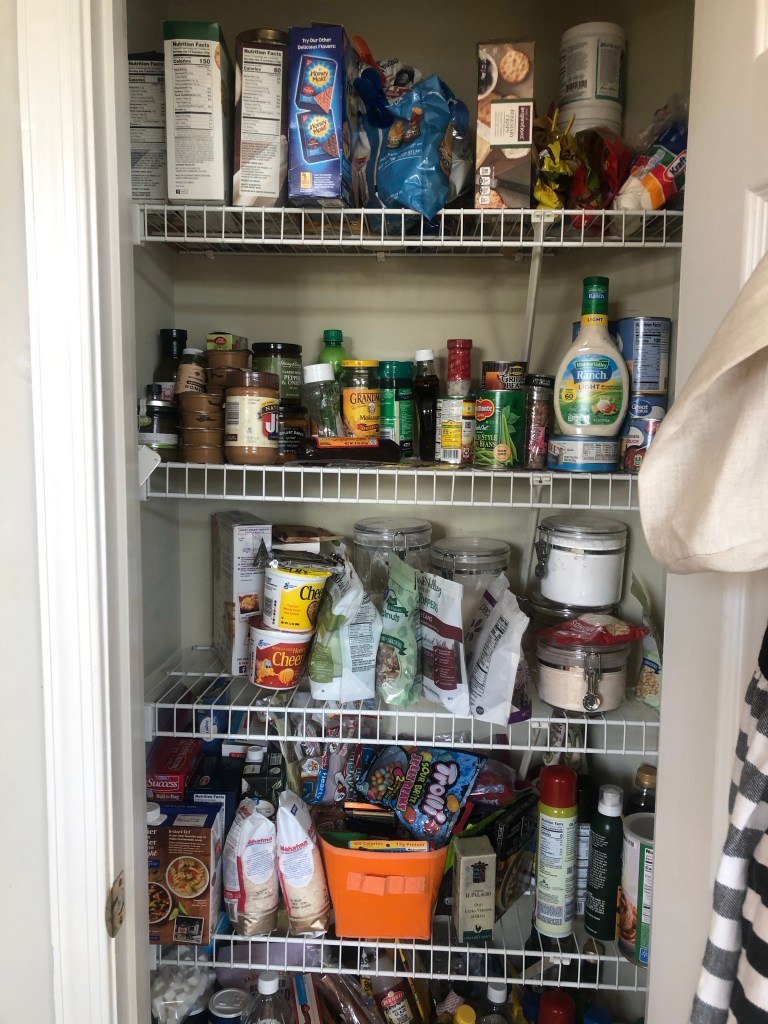
When Jody and I bought our house, I knew that updating the pantry was a project I wanted to tackle. We were coming from a walk-in pantry, with wooden shelves, and had now acquired a builder-grade, octangular little closet with wire racks (one of which was not fully attached to the wall!). It was harder to keep organized, smaller products were tricky to stand-upright, and was in desperate need of an update. Since it was smaller, I wanted to make this space more efficient, as well as more attractive to look at. Here is a look at it before:
Sticking to the overall design style of our house, I wanted to incorporate a farmhouse element through the pantry. I love the style of the wooden farmhouse shelving – I think it gives a space a nice, clean, simple appearance, in addition to being more practical. The wooden shelves would allow for items to stack better, help smaller items from falling through and would give this small space a bit of unique character.
For this project, my plan was to remove the original wire racks, plaster the holes, paint the walls, and then add some custom wood-stained shelves. I opted to paint the walls in Alabaster, by Sherwin Williams and stained the wood in semi-transparent Jacobean by Minwax.
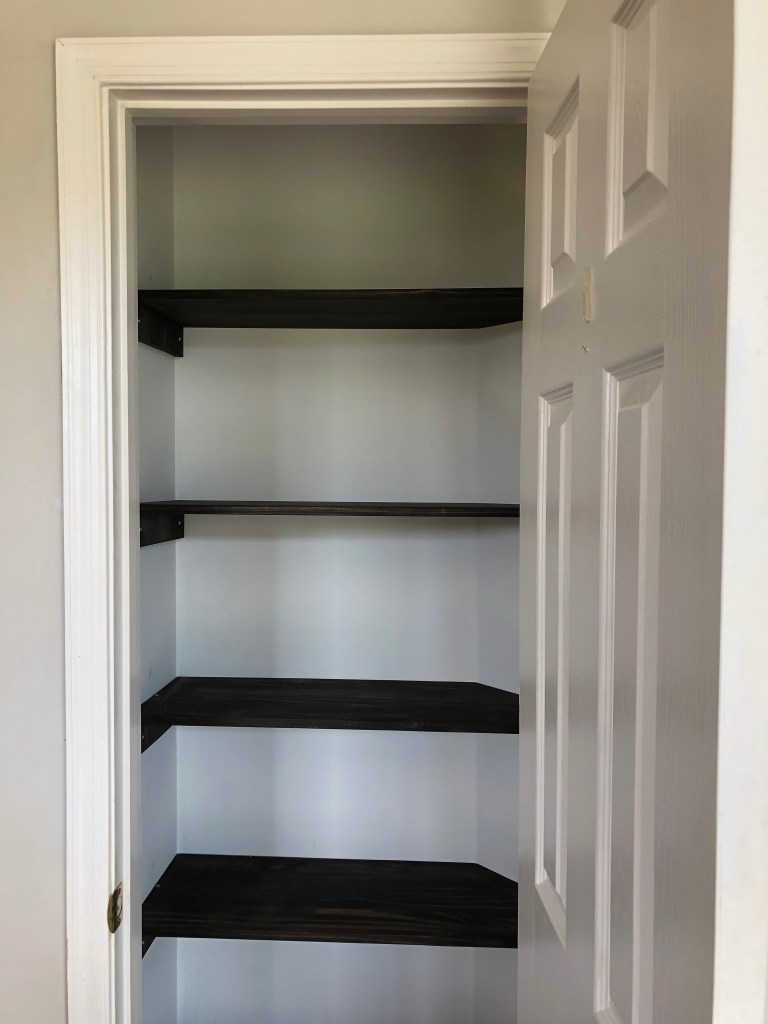
My mom has pretty remarkable craftsman skills, so I enlisted her help for this project. After purchasing the wood from Lowe’s, we cut it according to our measurements, using the extra pieces as the side braces to hold up the shelves. After staining, we first installed the braces on the side walls of the pantry, before laying the wooden shelves on top. I chose to keep the shelves in relatively the same spot, give or take a few inches, since that system seemed to work for us before.
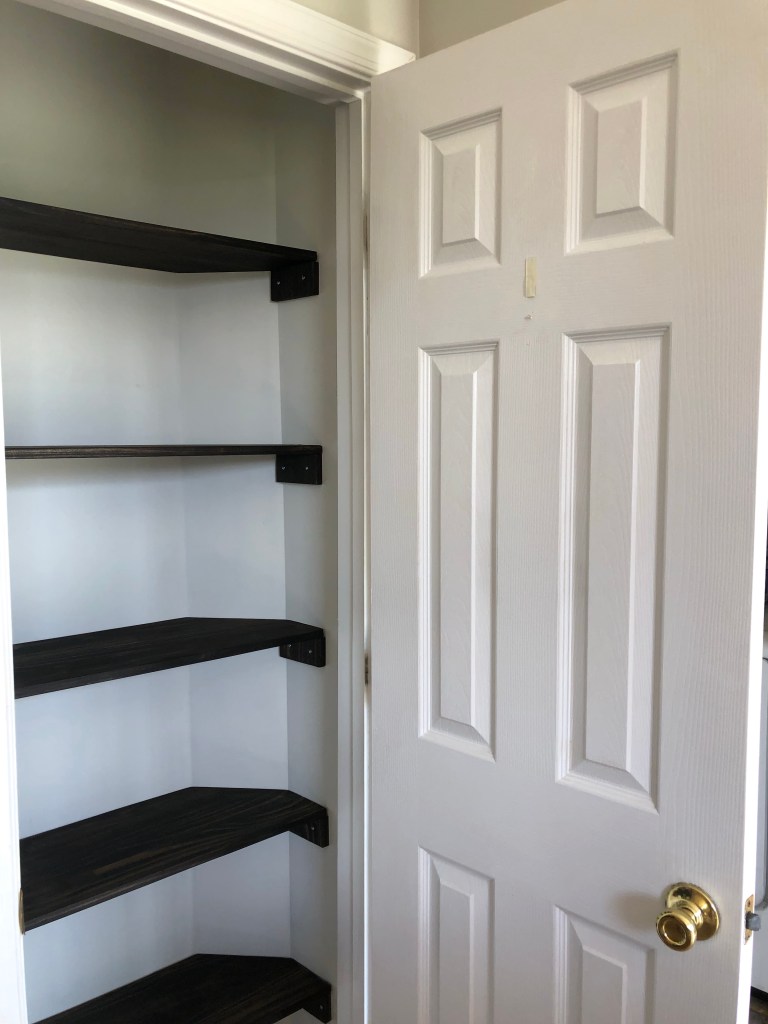
We originally thought that we could get this project completed in a weekend, but we ended up having to make the shelves twice. We struggled to get the measurements right with the odd angle in the back of the pantry but once that issue was resolved, the rest of the project was a breeze. I am so happy with how it turned out!
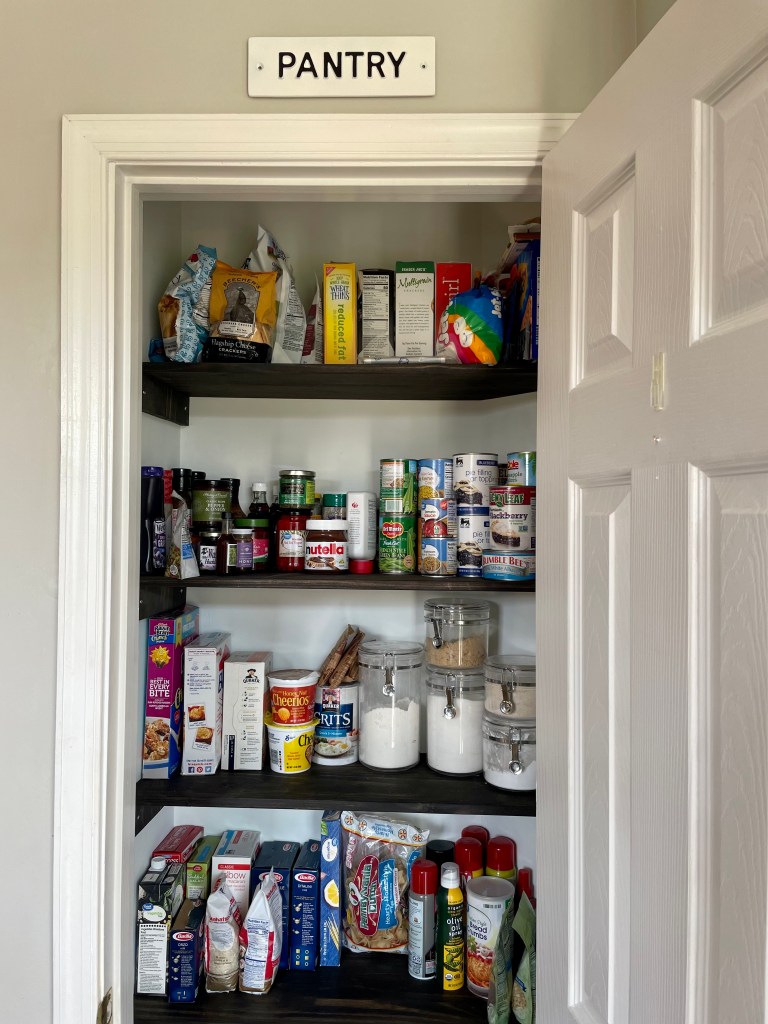
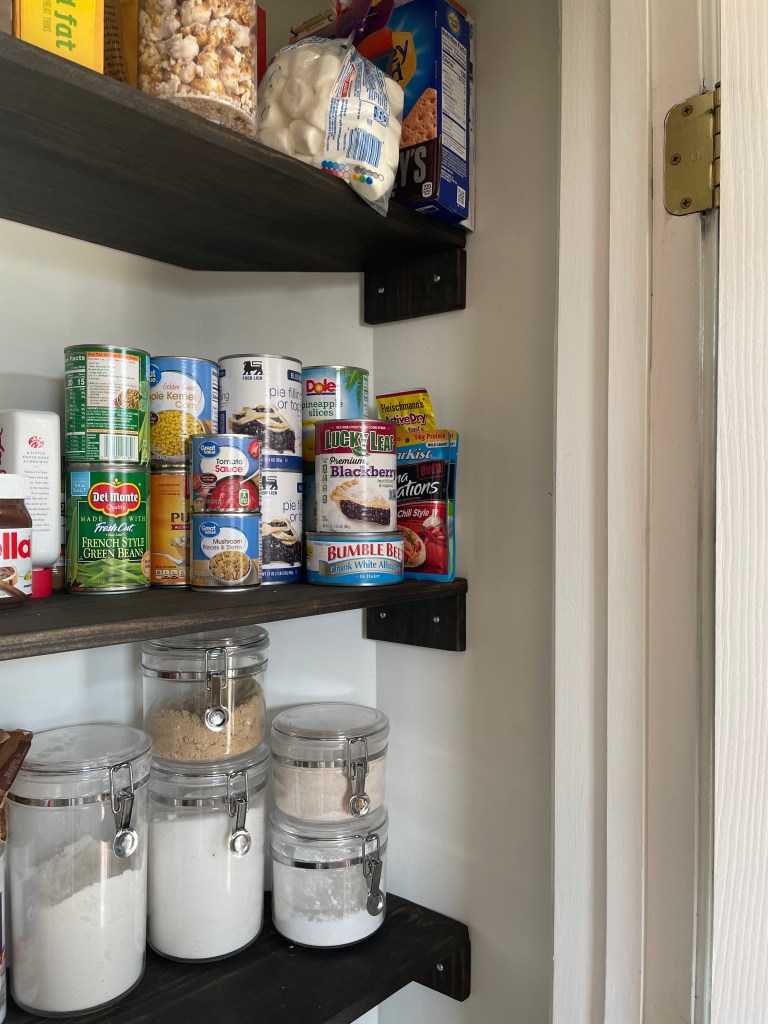

I still plan to get some different containers and baskets to keep this space well-organized, plus decide how to utilize the space on the back of the pantry door. We have several inches of space between the door and the start of shelving, so I’m considering attaching some racks to hold spices or other smaller containers. If you have a great use for this space, please share with me in the comments! Overall, I’m thrilled with how it turned out. It was a budget friend project (considering we bought and made 10 shelves!), and has made a huge impact on keeping this space organized. A simple upgrade makes our kitchen feel more welcoming and personalized. It feels great to have checked off this top priority project!

Impressive (and lengthy) job! Lengthy in the thinking, not the doing. So glad that it all worked out as planned!
LikeLike